


I have a Raspberry Pi Zero W, I’m a huge nerd. It was inevitable… I made a game console
Last November, Nintendo released the Nintendo Classic Mini, a mini console with 30 built in retro NES games. After playing one at Christmas I was impressed with the device. I searched high and low, but stock levels and popularity meant that these little things were going for double or triple the price on eBay. everywhere I looked it was sold out. I waited for a few months for one to become available and then Nintendo announced that they were going to discontinue them.
 Undeterred I decided I would build my own emulator and after looking around I decided the Raspberry PI Zero W would do the trick. The build was really easy, below are the steps I followed.

The Raspberry PI Zero W, was launched earlier this year and is an updated version of the standard Raspberry PI Zero. The updates are fairly innocuous but consist of some handy new features such as built in Wifi and Bluetooth 4.0. The PI Zero in it self is positively minuscule. I was surprised at how small when it arrived. Because I was starting from scratch I wanted to try and emulate more than just NES games.

The Megadrive along with the SNES were the consoles I remember most growing up. My sister and I spent way to much time playing Sega and Nintendo games when we were younger.

On to the build.
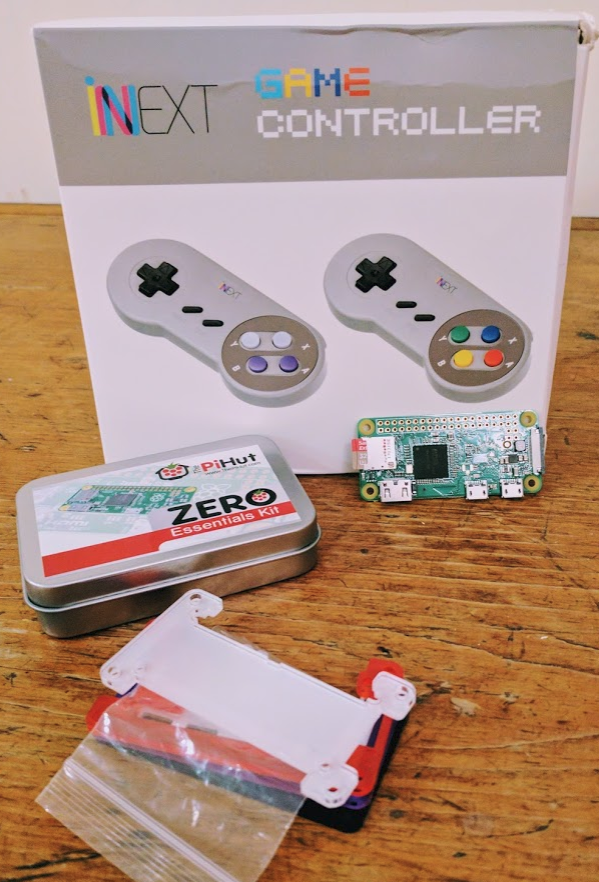
To create a mini emulation console you are going to need a few things. The PI hut do a kit with some of these items or you can shop around
- Raspberry PI Zero W (https://thepihut.com/products/raspberry-pi-zero-w )
- Mini hdmi – HDMI converter
- Micro usb to USB 2.0 converter
- USB or Bluetooth controllers http://amzn.to/2rsN5ss
- Micro SD Card (8gb or above) http://amzn.to/2qy0Ruw
- 5V 2A PSU or Micro usb power cable (standard phone charger type)
- A Case (selection here https://thepihut.com/collections/raspberry-pi-cases)
Next up the tech bit.
Download the SD image for your version of Raspberry Pi from the following page:
https://retropie.org.uk/download/
Extract
Once you have downloaded your SD card image you need to extract it using a program such as 7-Zip. You will extract the downloaded .gz file and the extracted file will be a .img file.
To extract from the command line, you can type the following into a Terminal window, placing X with version you downloaded:
gunzip retropie-4.X.X-rpi2_rpi3.img.gz
Install
To install the RetroPie SD image on your MicroSD card. (You may need a MicroSD card reader to plug it into your computer)
- For Windows you can use a program called Win32DiskImager
- For mac you can use Apple Pi Baker
- For Linux you can use
ddcommand or Etcher
Note RetroPie is built on top of Raspbian (a linux based OS for the Raspberry Pi) and as such the partition on the SD card is EXT4 (a linux filesystem) which is not visible on windows systems, so the card will show up as a smaller size than usual and you wont be able to see everything on the card
Configure Controllers
On first boot your filesystem will be expanded automatically, you will then be welcomed with the following screen- this menu will configure your controls for both Emulationstation and RetroArch Emulators: If you wish to configure more than one controller, you can do so from the start menu

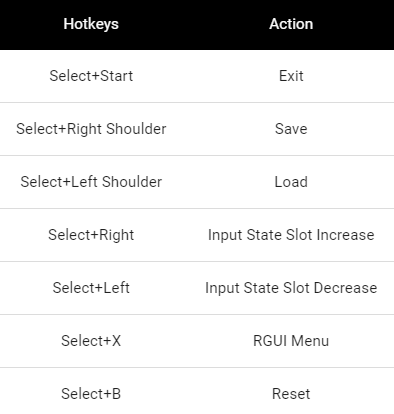
Hotkeys
Hotkeys enable you to press a combination of buttons to access functions such as saving, loading, and exiting emulators
Roms
Roms can be found all over the interweb but I found that https://www.emuparadise.me comes highly recommended. Physically transferring the ROM’s could not be more straightforward. You can write directly to the ROMS folder on the SD card, but I have found after adding the PI to my wifi navigating to //RETROPIE and find the corresponding ROM folder and then drag and drop.
PLAY!
After you’ve added your roms you need to restart emulationstation in order for them to show up. You can restart emulationstation from the start menu, or by rebooting your pi with sudo reboot.

